SolusVM Extended Reseller For WHMCS
Contents[hide] |
About SolusVM Extended Reseller For WHMCS
| SolusVM Extended Reseller For WHMCS is a great solution for every SolusVM server owner who has resellers. The module will allow you to automatically create and provision ready products to your resellers. |
- Features Included:
| ✔ Create/Suspend/Unsuspend/Terminate Reseller Account |
| ✔ Change Package - Supports Configurable Options |
| ✔ View And Modify Available Server Resources Per Account |
| ✔ Toggle Reseller Control Panel Button |
| ✔ Run API Connection Test |
- Available Configurable Options:
| ✔ Max Virtual Servers |
| ✔ Max Users |
| ✔ Max Memory |
| ✔ Max Burst/Swap |
| ✔ Max Disk Space |
| ✔ Max Bandwidth |
| ✔ Max IPv4 Address |
| ✔ Max IPv6 Address |
- General Info:
| ✔ Supports OpenVZ, Xen and KVM Virtualization |
| ✔ Integrated With DNS Manager For WHMCS - Supports PowerDNS (read more) |
| ✔ Integrated With Server Allocator For WHMCS - Automatic Assignment Of Most Suitable Servers To Products (read more) |
| ✔ Multi-Language Support |
| ✔ Supports PHP 8.1 Back To PHP 7.3 |
| ✔ Supports WHMCS Themes "Six" And "Twenty-One" |
| ✔ Supports WHMCS V8.8 Back To WHMCS V8.3 |
| ✔ Requires ionCube Loader V12 Or Later |
| ✔ Easy Module Upgrade To Open Source Version |
Installation and Configuration
| In this tutorial we will show you how to successfully install SolusVM Extended Reseller For WHMCS. We will guide you step by step through the whole installation and configuration process. |
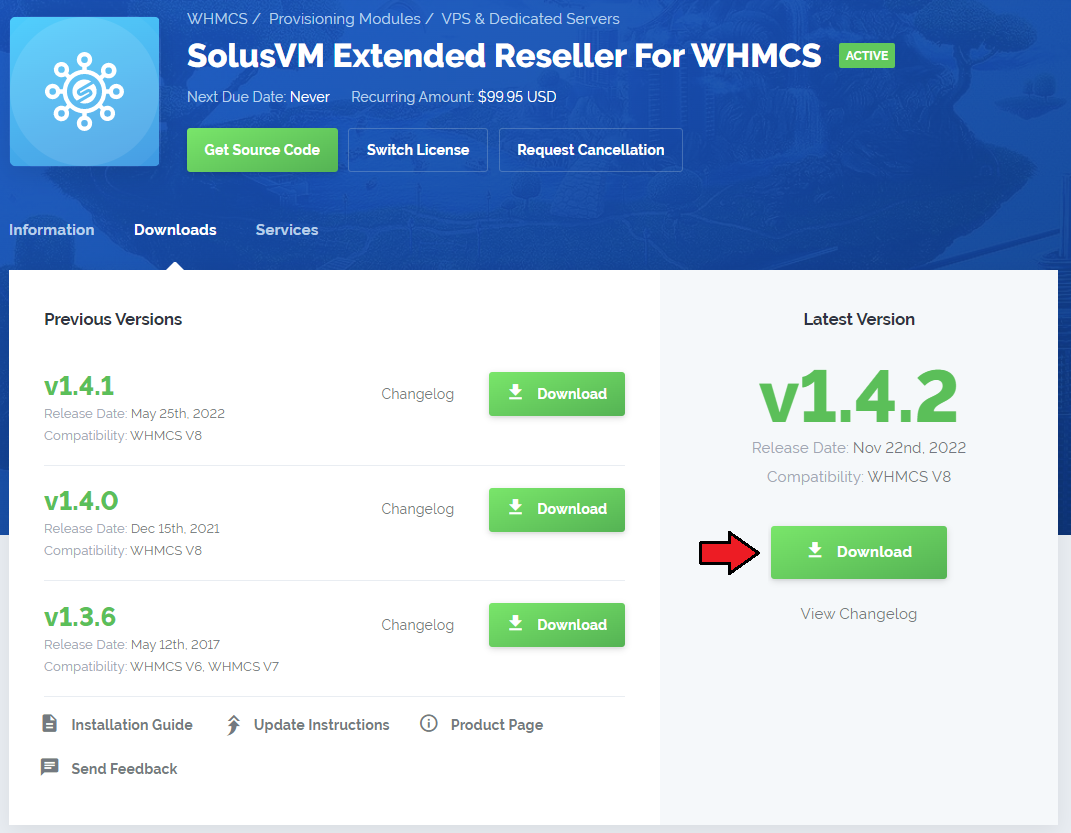
| 1. Log in to our client area and download the module. |
|
| 2. In the downloaded file you might find one or two packages that support different PHP versions. In the most recent versions of the module, you will find only one package that supports PHP 7.2 and later. |
| Previous updates of the module may contain two packages dedicated to various PHP versions. The first one that supports PHP 5.6 up to PHP 7.1, and the second one addressed to PHP 7.2 up to PHP 7.4. |

|
| Note: You can check the current PHP version in your WHMCS. To do so, proceed to 'Utilities' → 'System' → 'PHP Info'. |
| 3. Extract the package and upload its content into the main WHMCS directory. The content of the package to upload should look like this. |

|
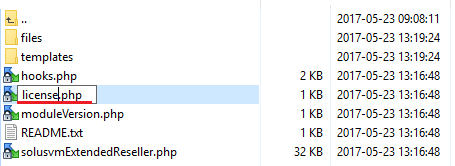
| 4. When you install SolusVM Extended Reseller For WHMCS for the first time you have to rename 'license_RENAME.php' file. File is located in 'modules/servers/solusvmExtendedReseller/license_RENAME.php'. Rename it from 'license_RENAME.php' to 'license.php'. |
|
| 5. In order to configure your license key you have to edit a previously renamed 'license.php' file. Enter your license key between quotation marks as presented on the following screen. You can find your license key in our client area → 'My Products'. |

|
Configuration of API Access
| 6. Now, we will show you how to configure a new product. Firstly, log in to your SolusVM admin area, go to 'Configuration' → 'API Access' and press 'Add API User'. |

|
| 7. Fill in your IP address and once again click on 'Add API User' button. |

|
Configuration of Server
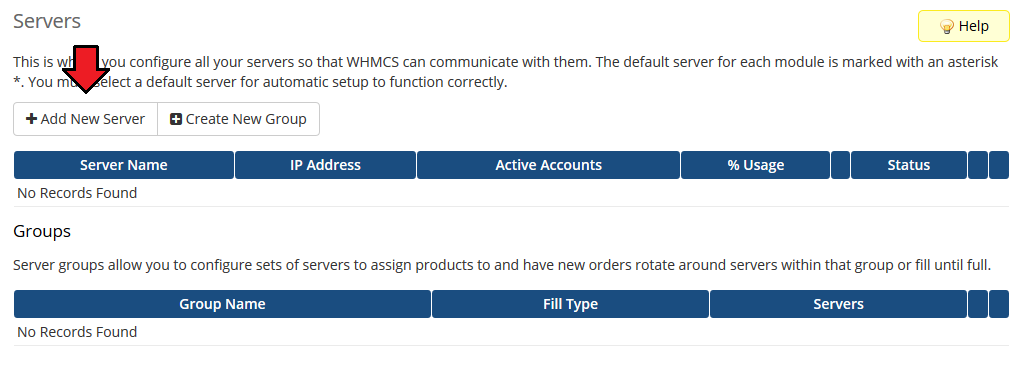
| 8. Now, log in to your WHMCS admin area and proceed to 'System Settings' → 'Servers'. Afterwards, press 'Add New Server'. |
|
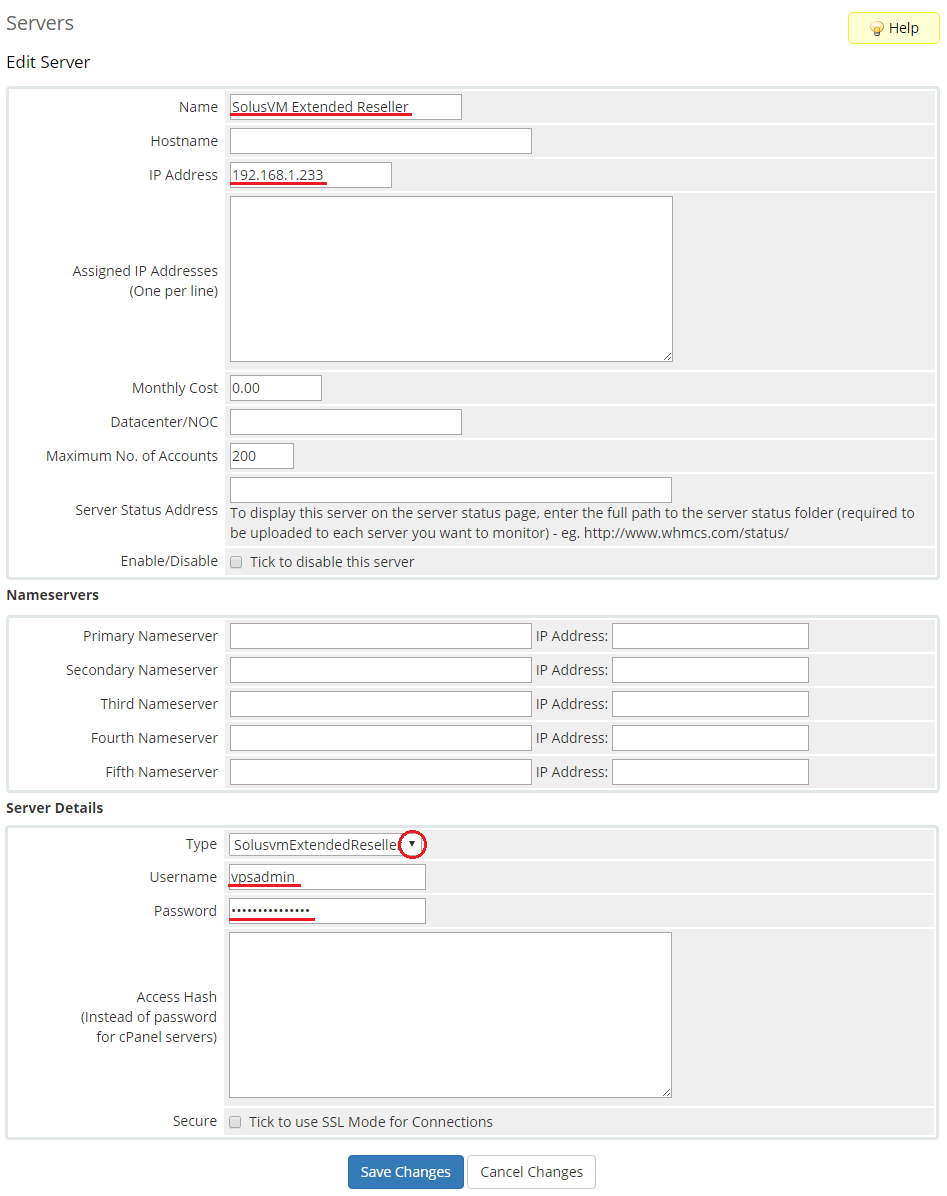
9. Enter your server name and IP address.
Choose 'SolusvmExtendedReseller' from a dropdown menu and press 'Save Changes'. |
|
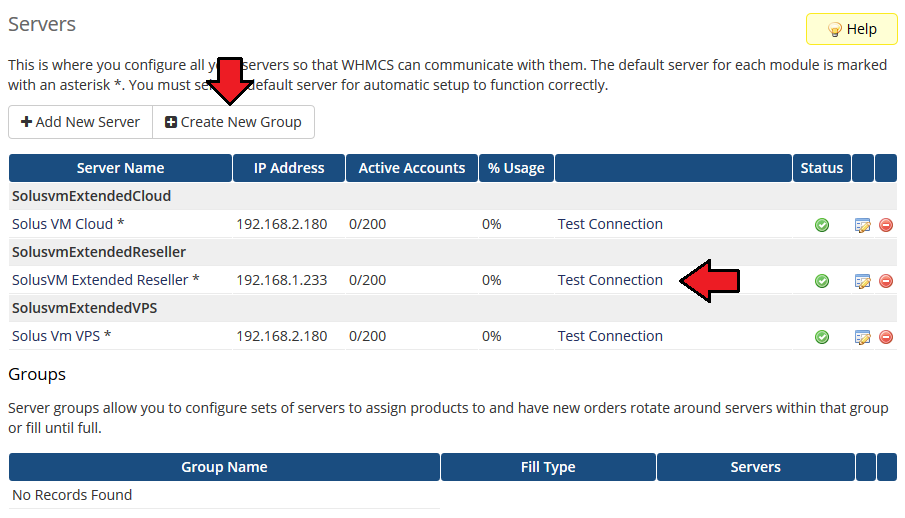
| 10. After you configure your server correctly, you will see a following screen. Test your connection through pressing 'Test Connection'. |
|
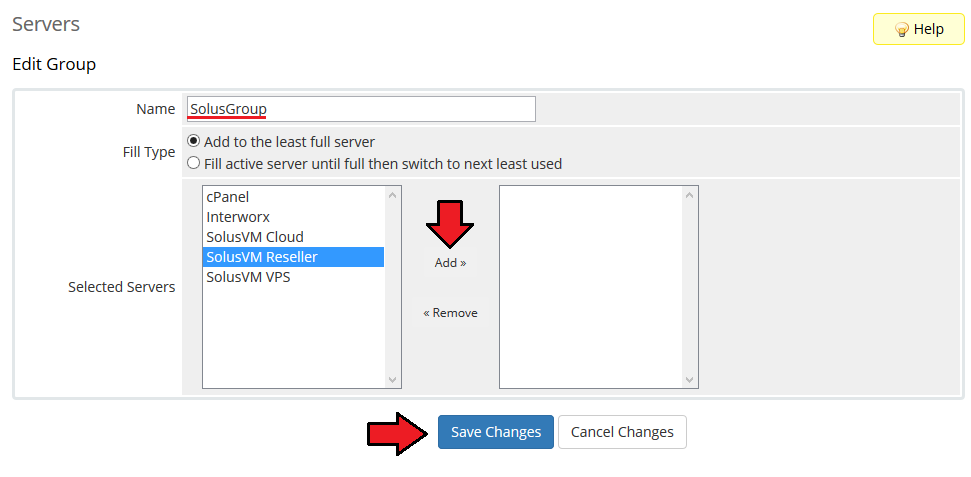
| 11. Fill in a group name, click on your previously created server and press 'Add'. Confirm creation of the group through pressing 'Save Changes'. |
|
Configuration of Product
| 12. In order to create and configure a product, go to 'System Settings' → 'Products/Services'. Now, click on 'Create a New Group'. |

|
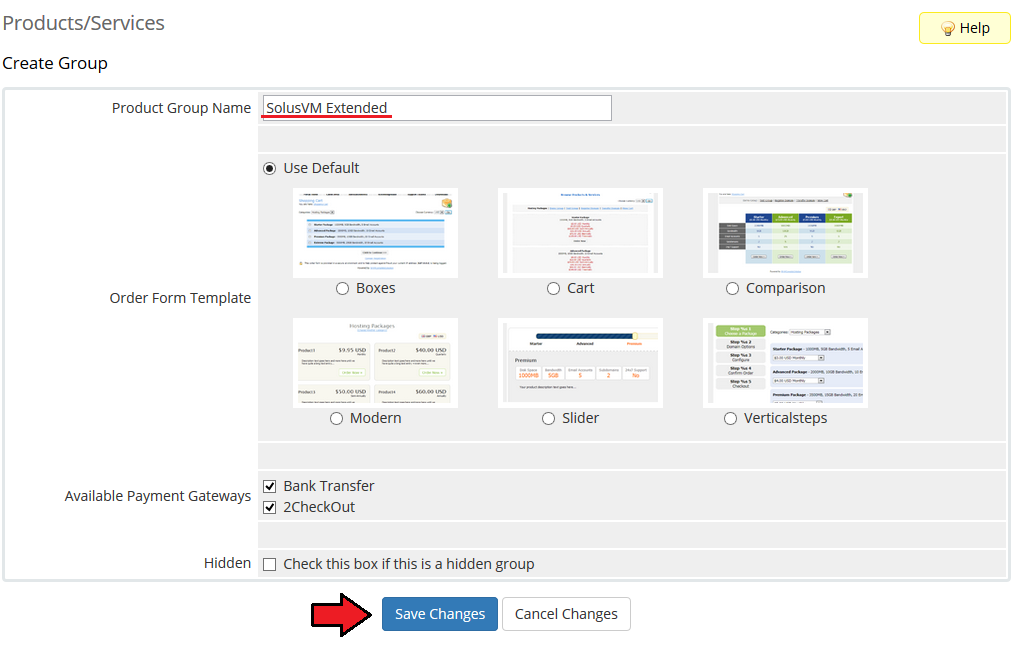
| 13. Enter a product group name and press 'Save Changes'. |
|
| 14. When you have a product group, you can create your product and assign it to SolusVM Extended Reseller. To create a product click on 'Create a New Product'. |

|
| 15. Afterwards, choose a product type and a previously created product group from dropdown menus, fill in a product name and press 'Continue'. |

|
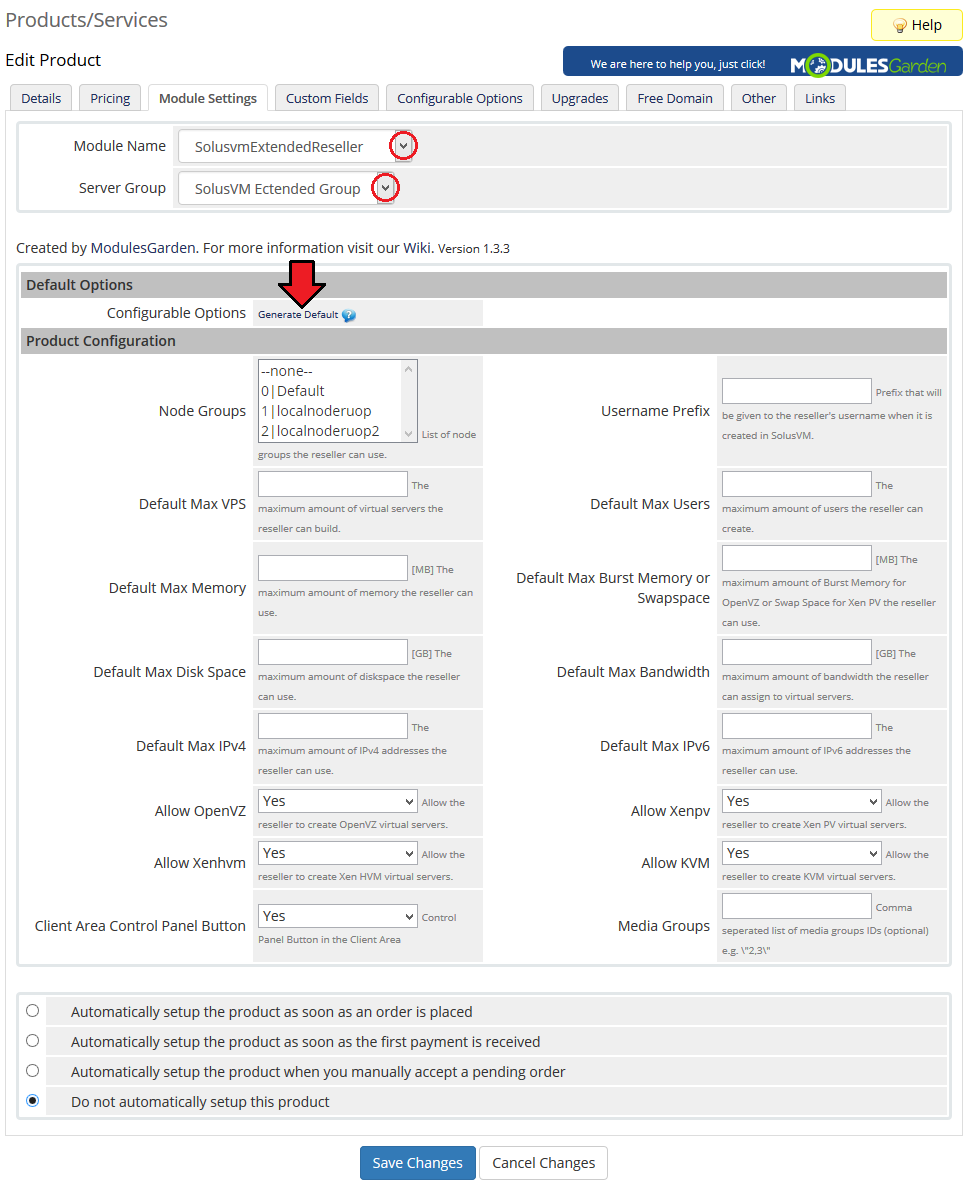
| 16. Now, go to 'Module Settings' section, choose both 'SolusvmExtendedReseller' and a previously created server group from dropdown menus. Next, 'Save Changes' and generate configurable options as shown on the following screen. |
|
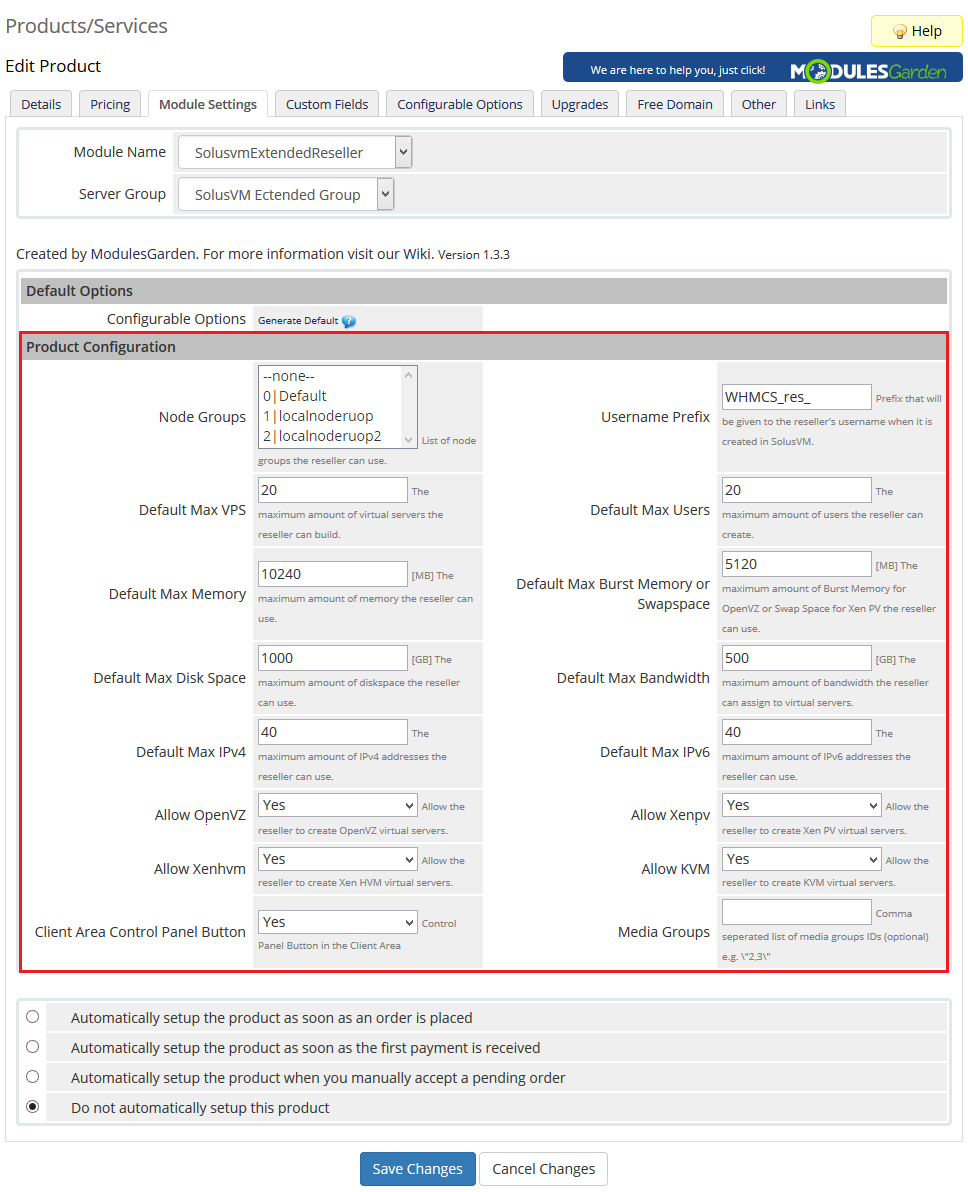
| 17. Under 'Product Configuration' section you can select functionalities you wish to offer to your resellers as well as define resources limits. |
|
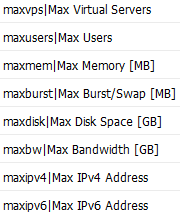
| 18. Providing you use configurable options you can allow your customers to place orders tailored to their needs. Our module offers the following configurable options: |
|
| You have just finished the installation and configuration of the module. From this moment your customers can start to place orders! |
Management
| SolusVM Extended Reseller For WHMCS allows your resellers to view server resources and quickly access their reseller control panels. |
Interface
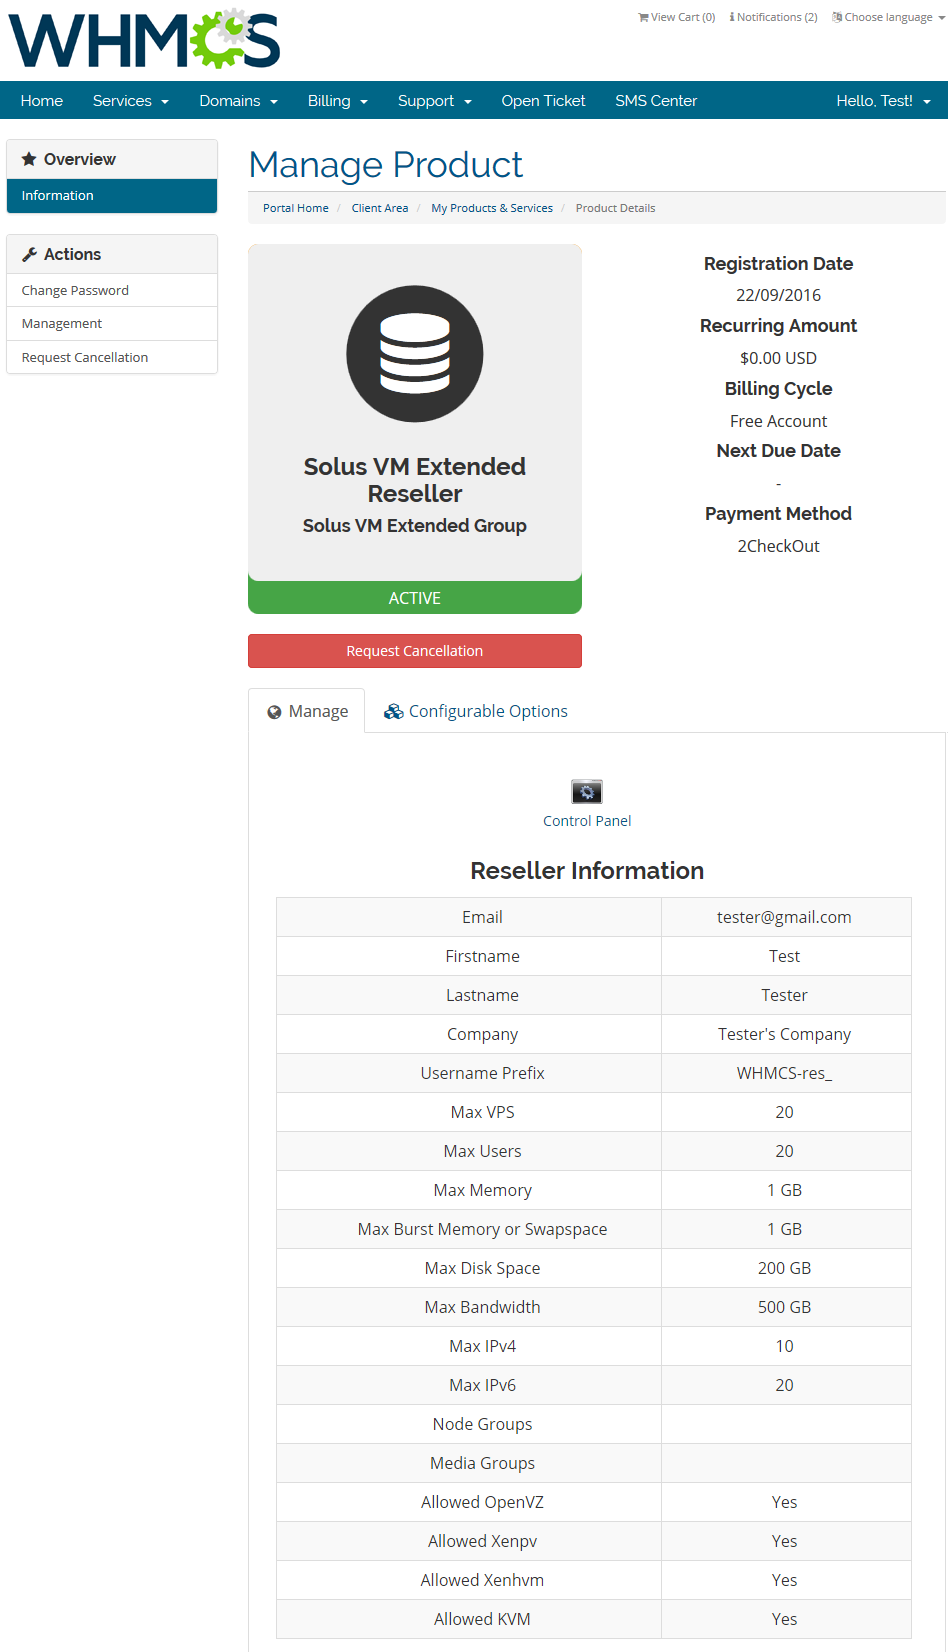
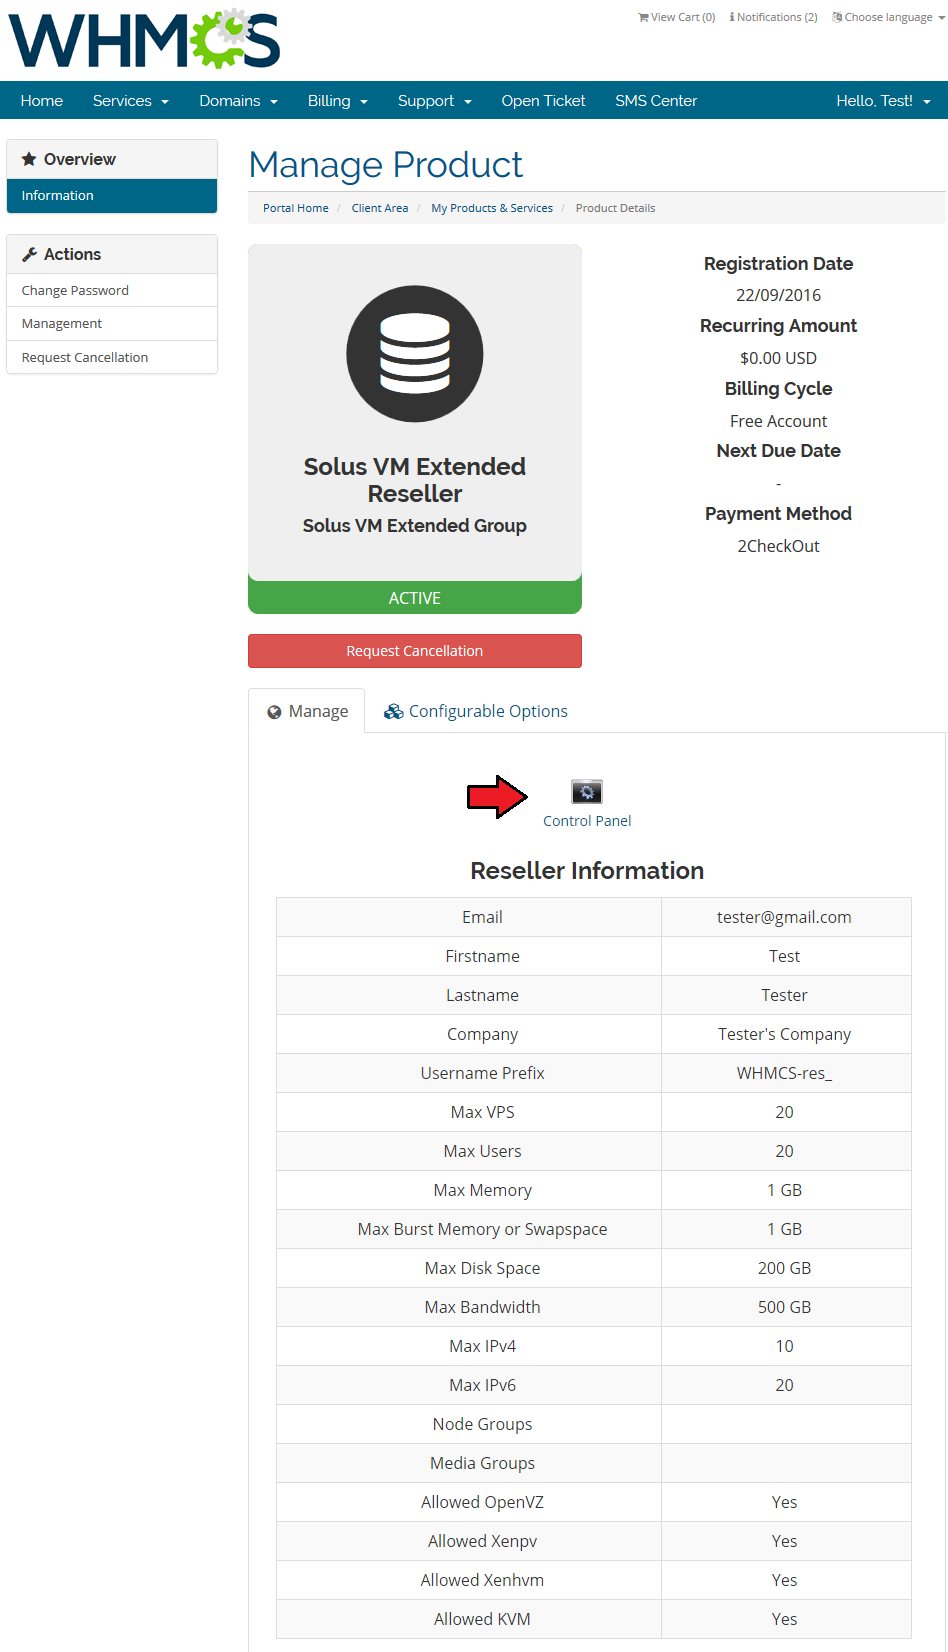
| Now, let's check the interface of the module in your WHMCS client area. As you can see, the module displays all the information important to your resellers. |
|
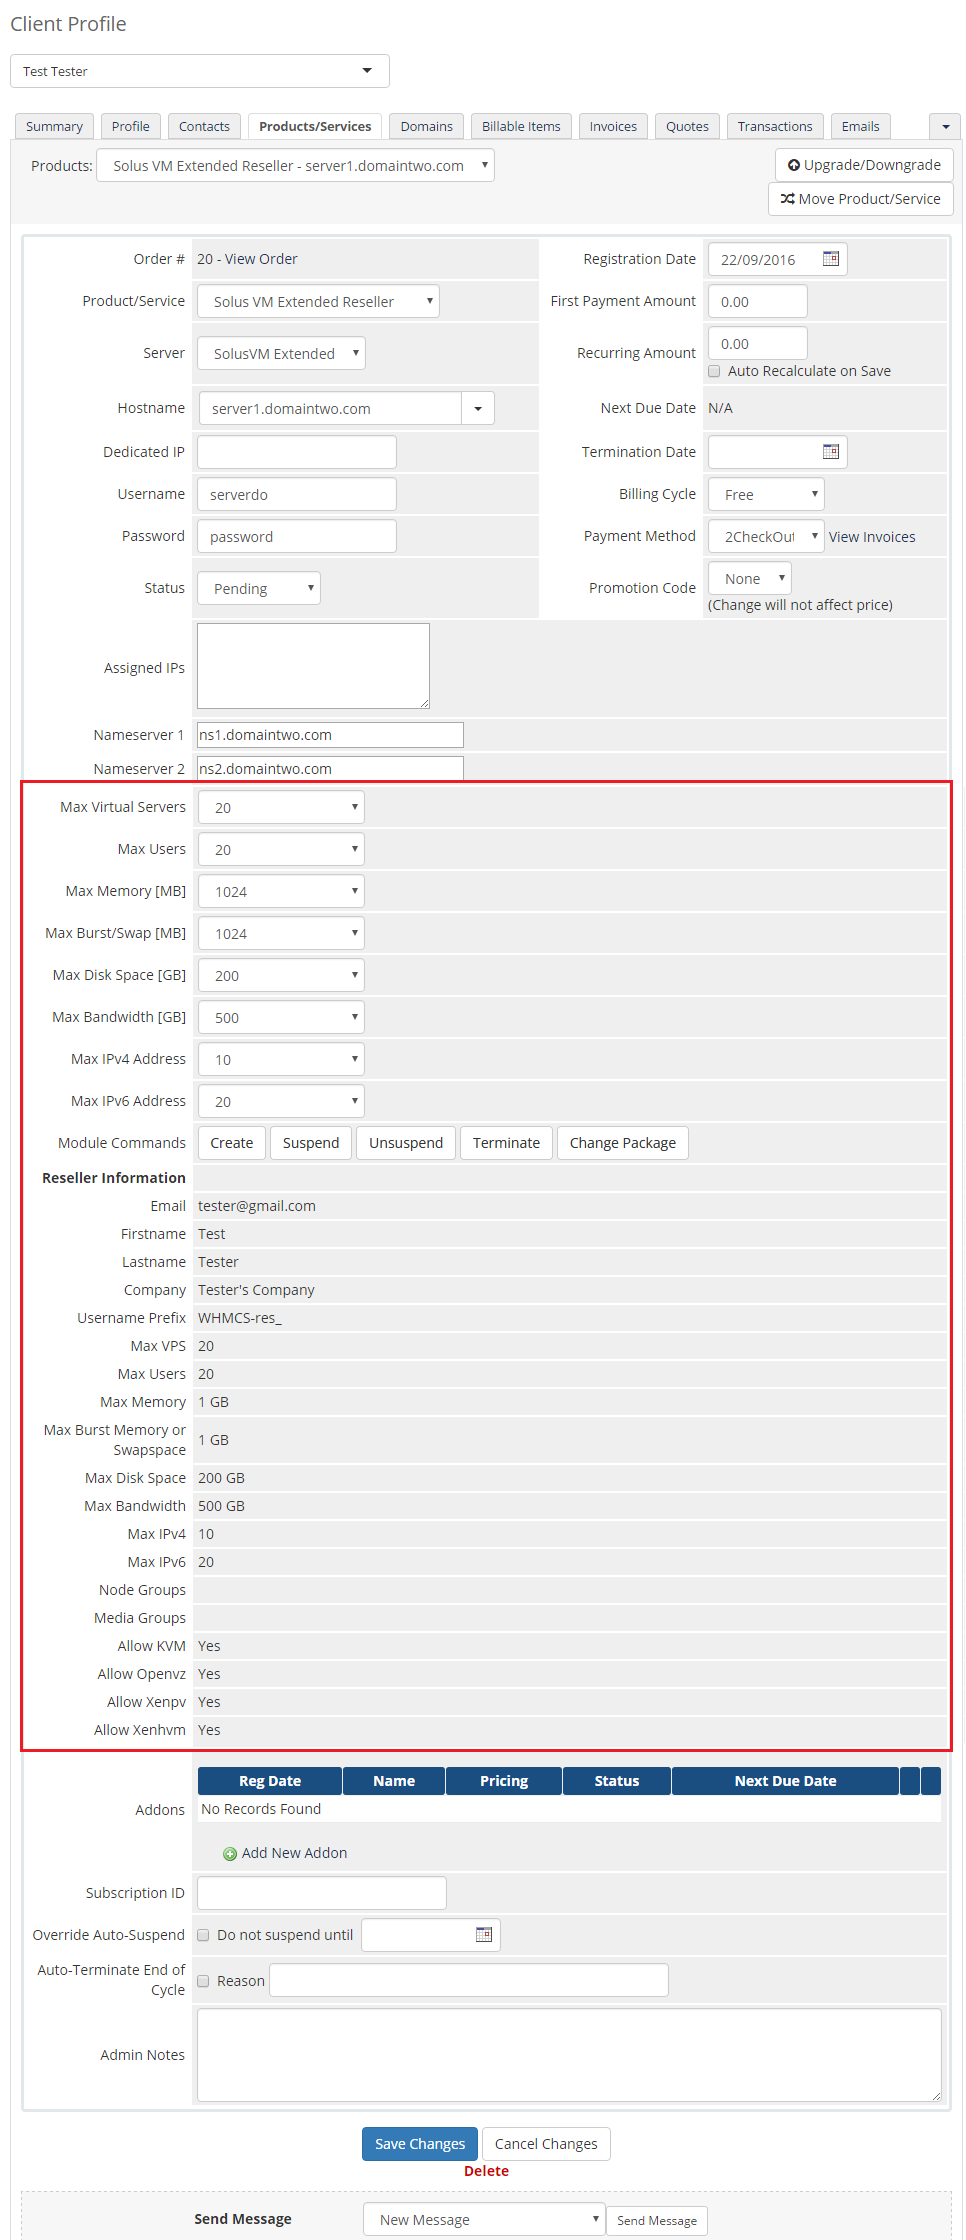
| You can monitor and manage each product from your WHMCS admin area. |
|
| Your resellers can also quickly access their panels through clicking on 'Control Panel' button. |
|
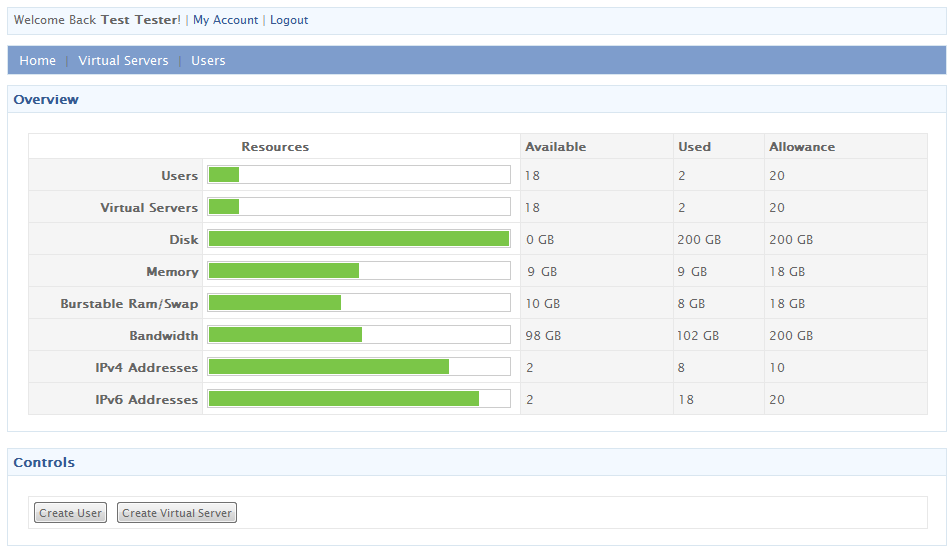
| Voila! One click in WHMCS client area and we are inside Reseller Control Panel. |
|
Management of DNS
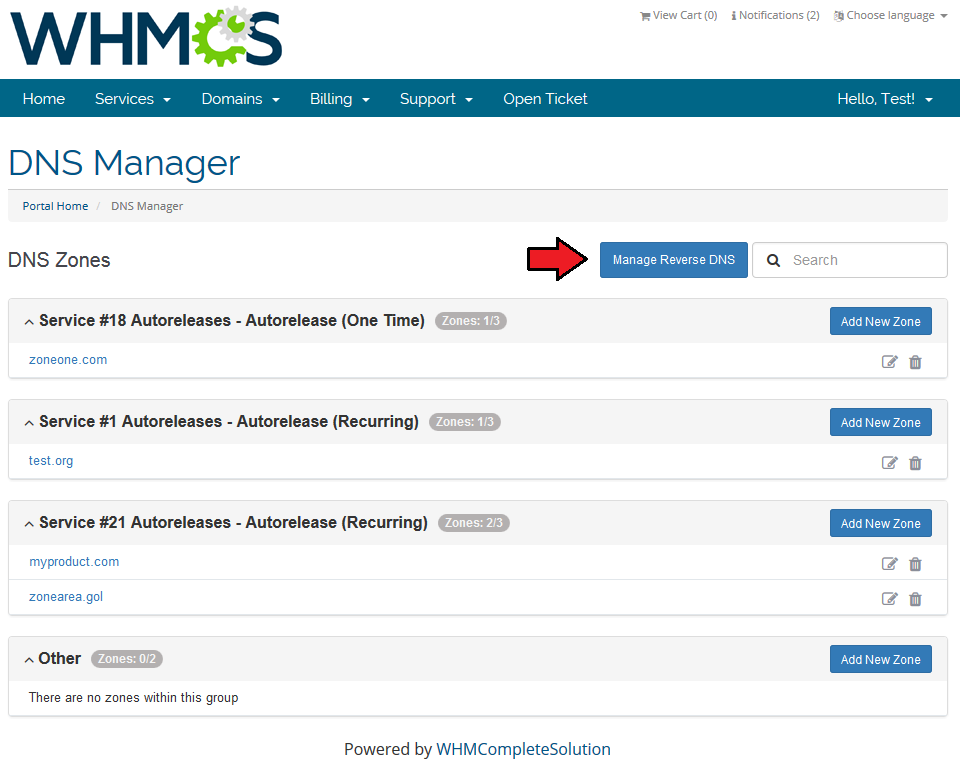
| When you combine SolusVM Extended Reseller For WHMCS with DNS Manager For WHMCS, your clients will be able to manage zones and records from the client area. DNS Manager For WHMCS allows your customers to manage DNS zones, records and ReverseDNS. |
|
Tips
| 1. We made every effort to make our module as easy to install, configure and use, as possible. Therefore we paid special attention to displayed messages. Read carefully each message, follow the instructions and you shall have no problems with using the module. |
| 2. Operations performed on the virtual servers are not executed immediately. Give your SolusVM server some time to process the request and execution of operation. |
Update Instructions
| Essential guidance through the process of updating the module is offered here. Keep in mind there is a quick and easy option in our client area that will let you upgrade the license of your module to an open source version at any time - and at a lower price! |
Common Problems
| 1. When you have problems with connection, check whether your SELinux or firewall does not block ports. |
| 2. The vast majority of problems are connected with misconfigured SolusVM server or misconfigured servers/products in your WHMCS. Firstly, make sure that your SolusVM server has properly configured virtual servers, nodes, node groups, templates, plans and API access. |
| 3. By default our module connects with SolusVM server on port 5353. If you are using different port, you need to specify it in 'Hostname' field. Default port for SSL connections is 5656. To connect on that port enter your hostname as follows: 'yourhostname.com:5656' . Keep in mind that you can connect on any port. |