Servertastic SSL For cPanel
Contents |
About Servertastic SSL For cPanel
| Servertastic For cPanel will allow your clients to automatically install SSL certificates on their websites. You will easily trace the progress on SSL configuration and handle other security features. |
- WHM Area Features:
| ✔ View List Of Domains With Installed Certificates |
| ✔ Remove Installed Certificates |
| ✔ View Task Status Of Cron Executions |
| ✔ View Detailed Logs Of API Errors |
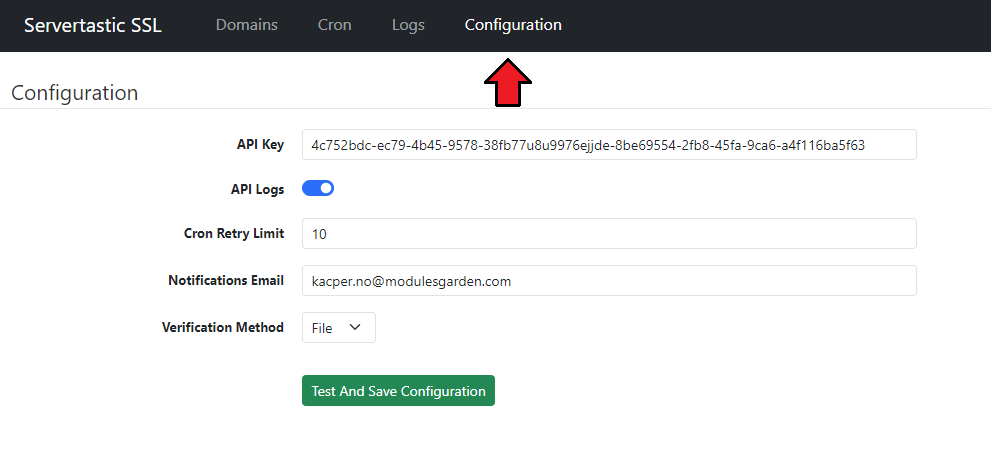
| ✔ Set Email For Notifications On Certificates Approvals |
| ✔ Define Limit Of Cron Retries |
| ✔ Choose File Or DNS Method Of SSL Authentication |
- cPanel Area Features:
| ✔ Install Certificates For Main And Addon Domains Using Pre-generated Tokens |
| ✔ View Basic Certificates Details |
| ✔ Remove Installed Certificates |
- General Info
| ✔ Token Based Certificates Installation |
| ✔ Requires Servertastic SSL For WHMCS Module |
| ✔ Multi-Language Support |
| ✔ Supports cPanel Themes "Jupiter" And "Paper Lantern" |
| ✔ Supports cPanel & WHM 98 And Later |
Installation and Configuration
| This tutorial will show you how to successfully install and configure Servertastic SSL For cPanel. We will guide you step by step through the whole installation and configuration process. |
Installation
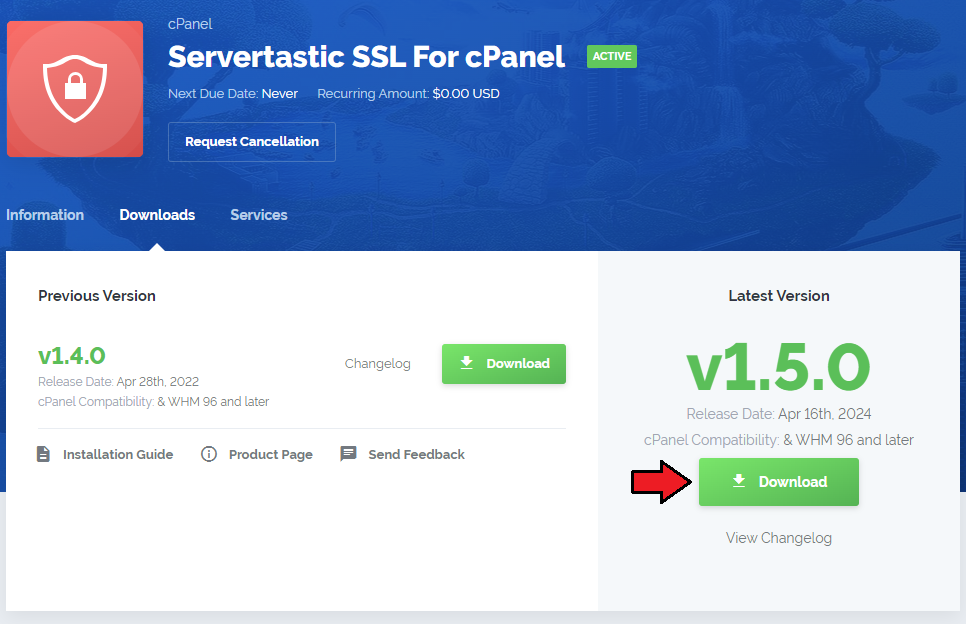
| 1. Log in to our client area and download the module. |
|
| 2. Upload and extract the module into the /root cPanel directory. Files in your cPanel /root/ServerTasticSSL directory should look like these on the following screen. |

|
3. Once the module is uploaded, run the following command from the console:cd /root/ServerTasticSSL/ sudo sh install Next, follow the instruction displayed on the console. Type the yes command to confirm. After a brief moment you should see a confirmation that the plugin has been successfully installed. |

|
Configuration
| 4. In order to configure the plugin, go to 'WHM' → 'Plugins' → 'Servertastic SSL' . |

|
5. Click the 'Configuration' and fill in the following records:
|

|
|
|
| Your module is almost ready to use. |
WHMCS Integration
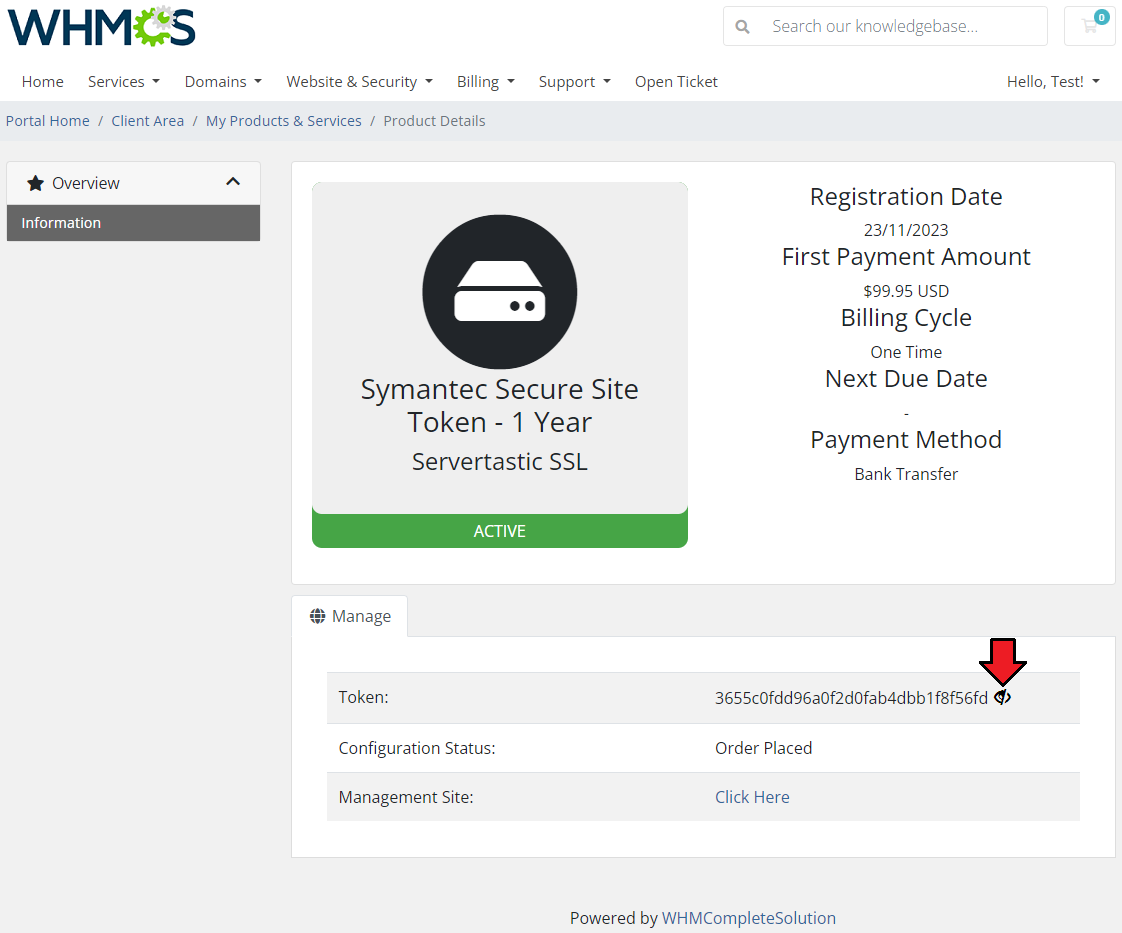
| 6. Due to the fact that cPanel does not support customer transactions, the Servertastic SSL For WHMCS module can be used to sell paid certificates. Hence, customers will be able to purchase certificate tokens in WHMCS, which can be later on used to set up certificates for domains in cPanel. |
|
| The instructions for installing the provisioning module for generating tokens in WHMCS can be found on the Servertastic SSL For WHMCS documentation. Follow the next steps when ready. |
Management
| Servertastic SSL For cPanel allows you to offer SSL certificates to your clients. Moreover, you have the ability to view the details and take control of each provisioned certificate. |
WHM Area
| In the WHM area you can track essential details of each certificate and monitor the status of SSL configuration. In addition, you can explore Cron and API logs. |
Domains
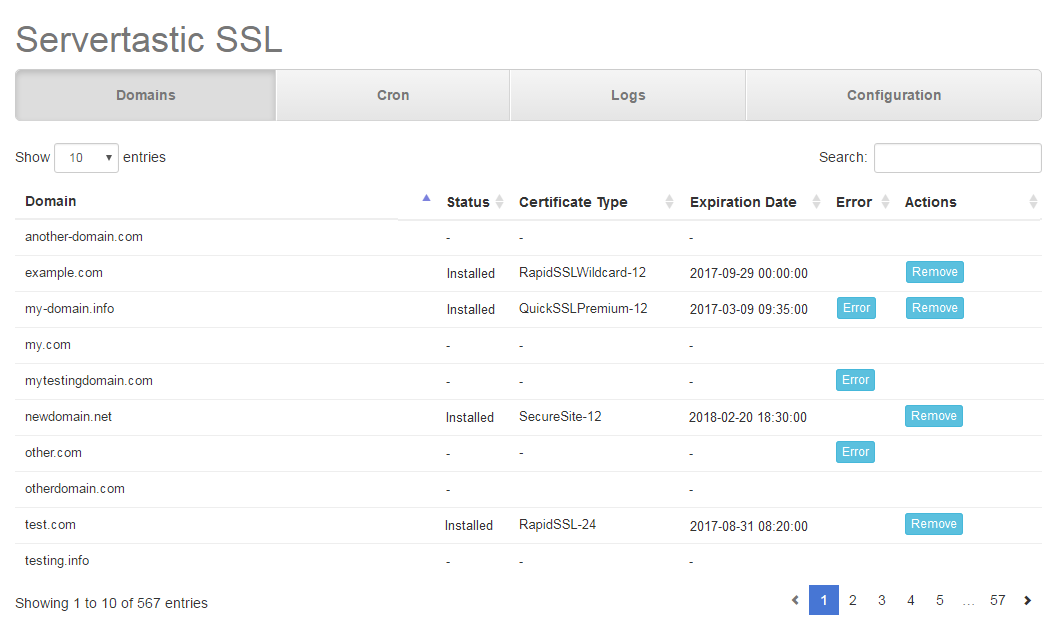
| In this section you will find all domains available in WHM as well as important information concerning installed certificates. You can view the current status and type of each certificate along with its expiration date, as well as use the option to Remove certificate. Click the 'Error' button to see detailed logs of any API errors. |
|
Cron
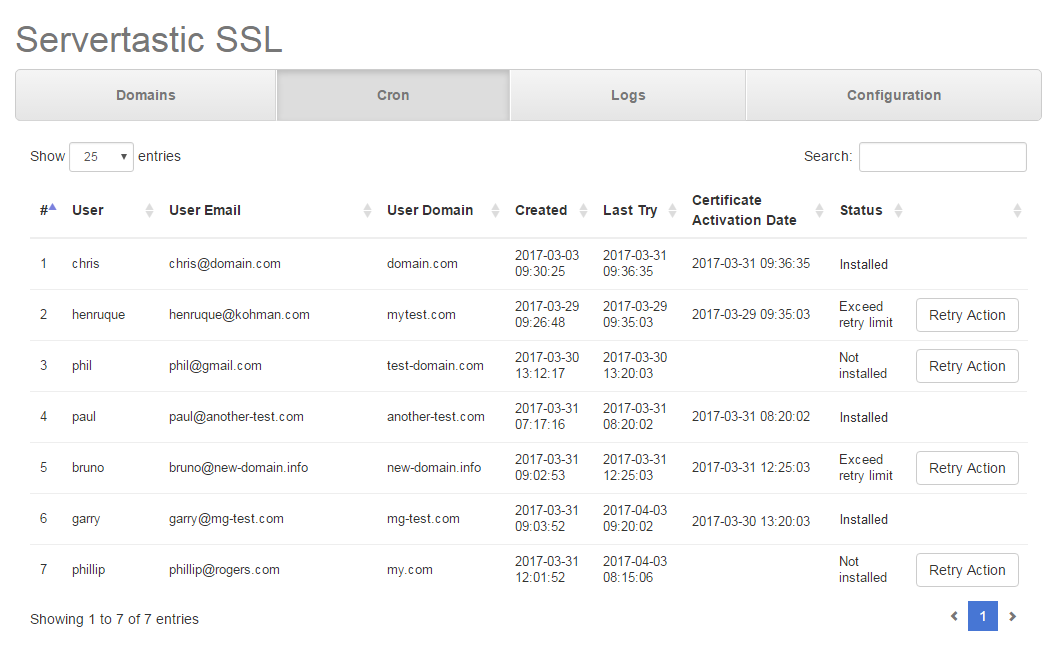
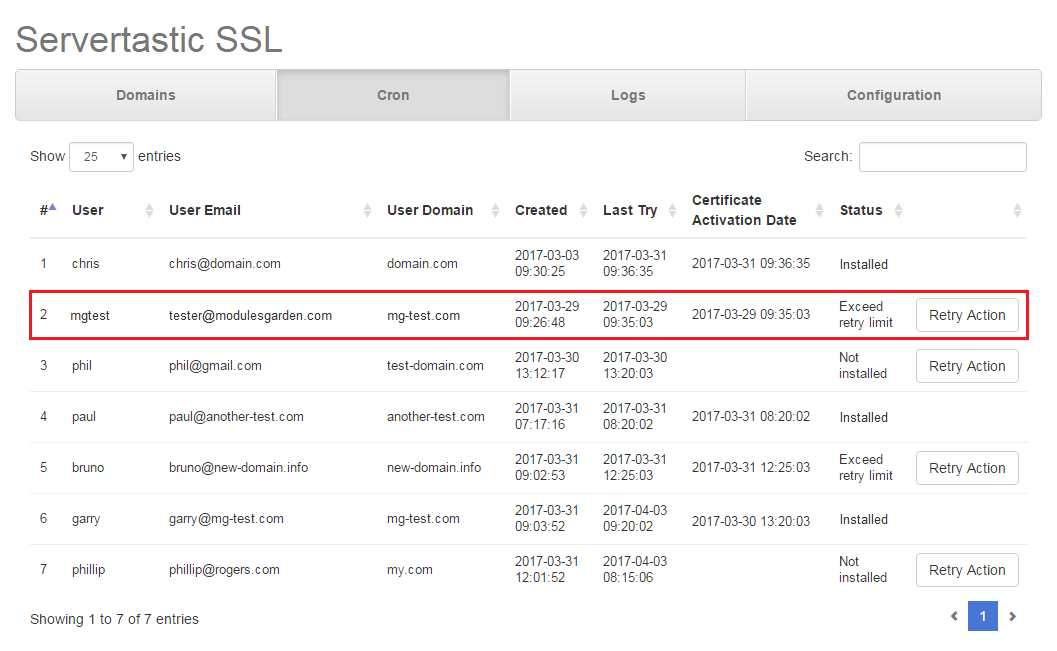
| In the Cron section, you will find all existing cron tasks. Tasks are added in case any error occurs followed by a verified request for certificate installation. As you can see, the administrator can either manually trigger the action again or wait for the next cron run (the cron runs every 5 minutes by default). |
|
Logs
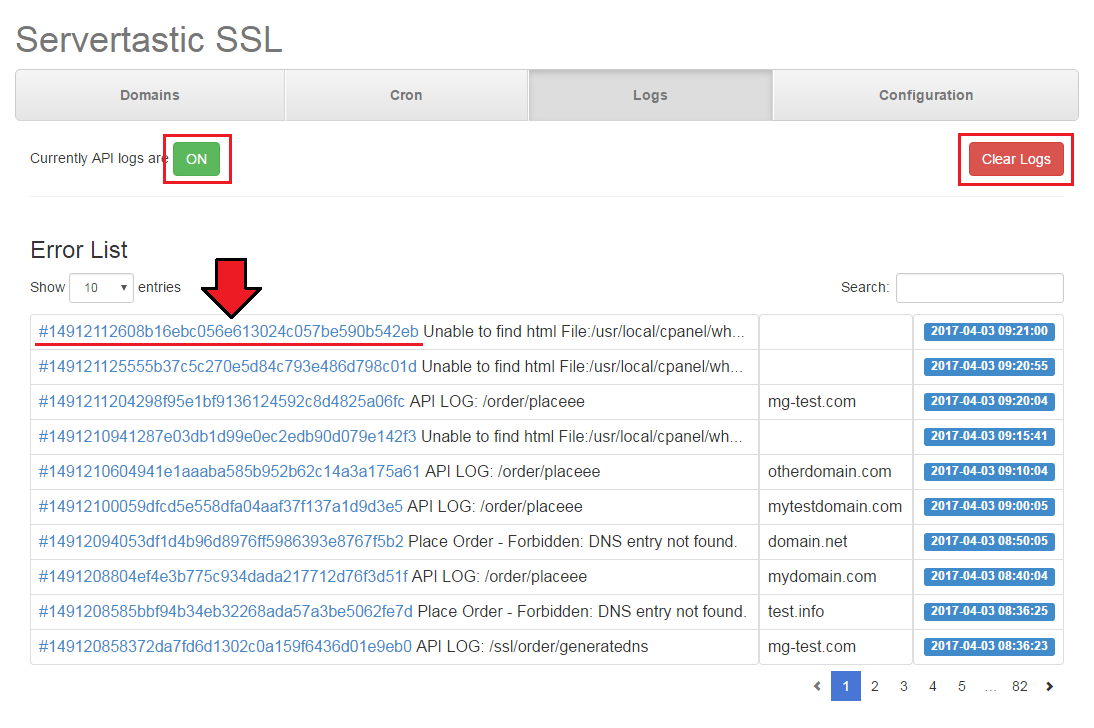
| The Logs section includes the list of all failed cron executions. You can clear the logs if necessary. Please remember that you may always turn the logs off in the configuration tab or by switching the button On to Off. |
|
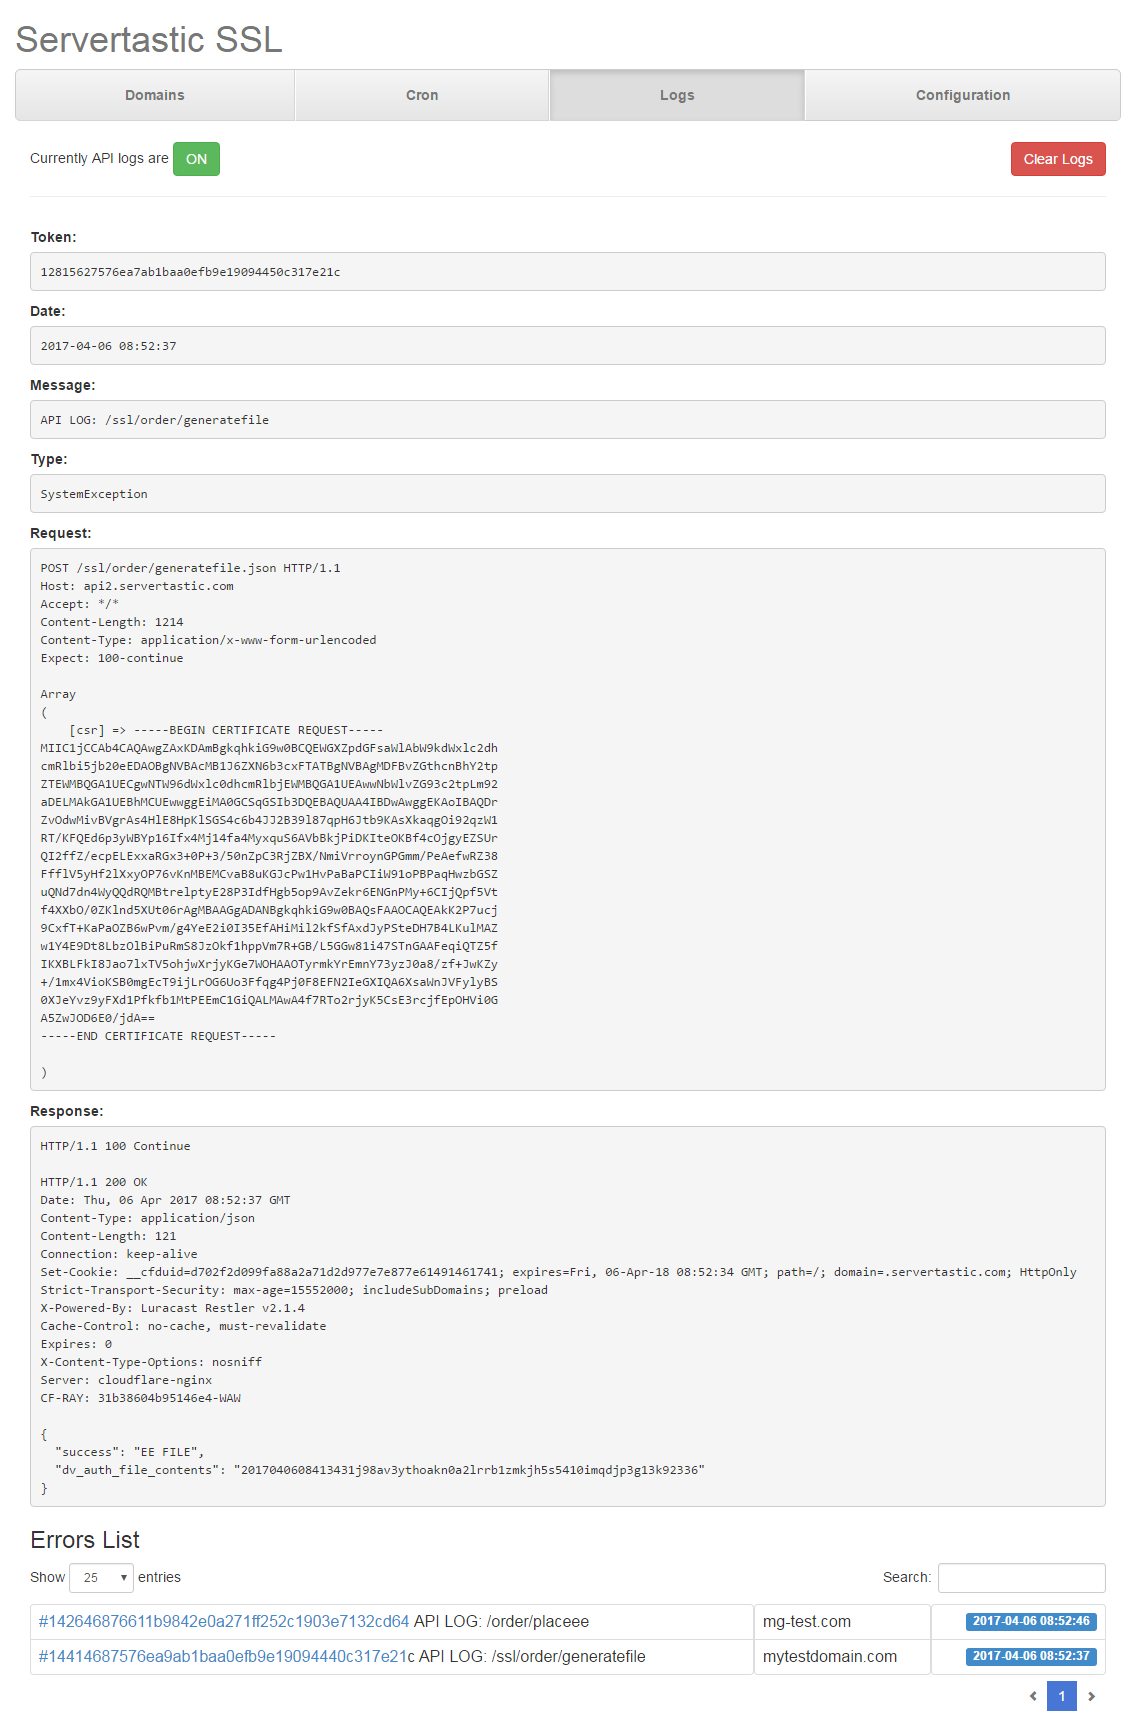
| Clicking on the Token number will move you to the more detailed error log with the API requests and responses. |
|
cPanel Area
| Servertastic SSL For cPanel allows your customers to set up and configure SSL certificate for main or addon domains. Log in to your cPanel account. Then proceed to the 'Security' → 'HTTPS Installer' . |

|
Request
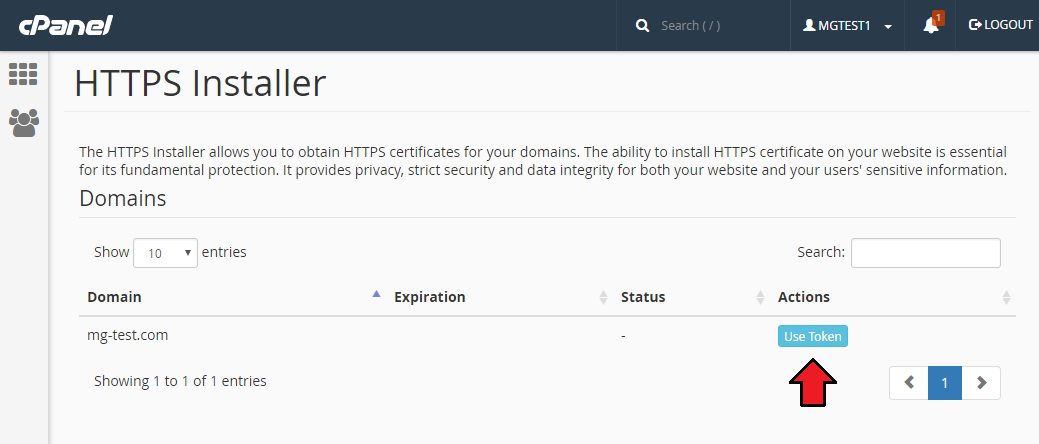
| You can see the list of your domains with their current status. Press Use Token for a given domain to submit the request for a certificate.
Note: Remember that in order to get a token, it is necessary to make integration with WHMCS. |
|
| Next, enter the obtained token and click on the 'Add Certificate' button. |

|
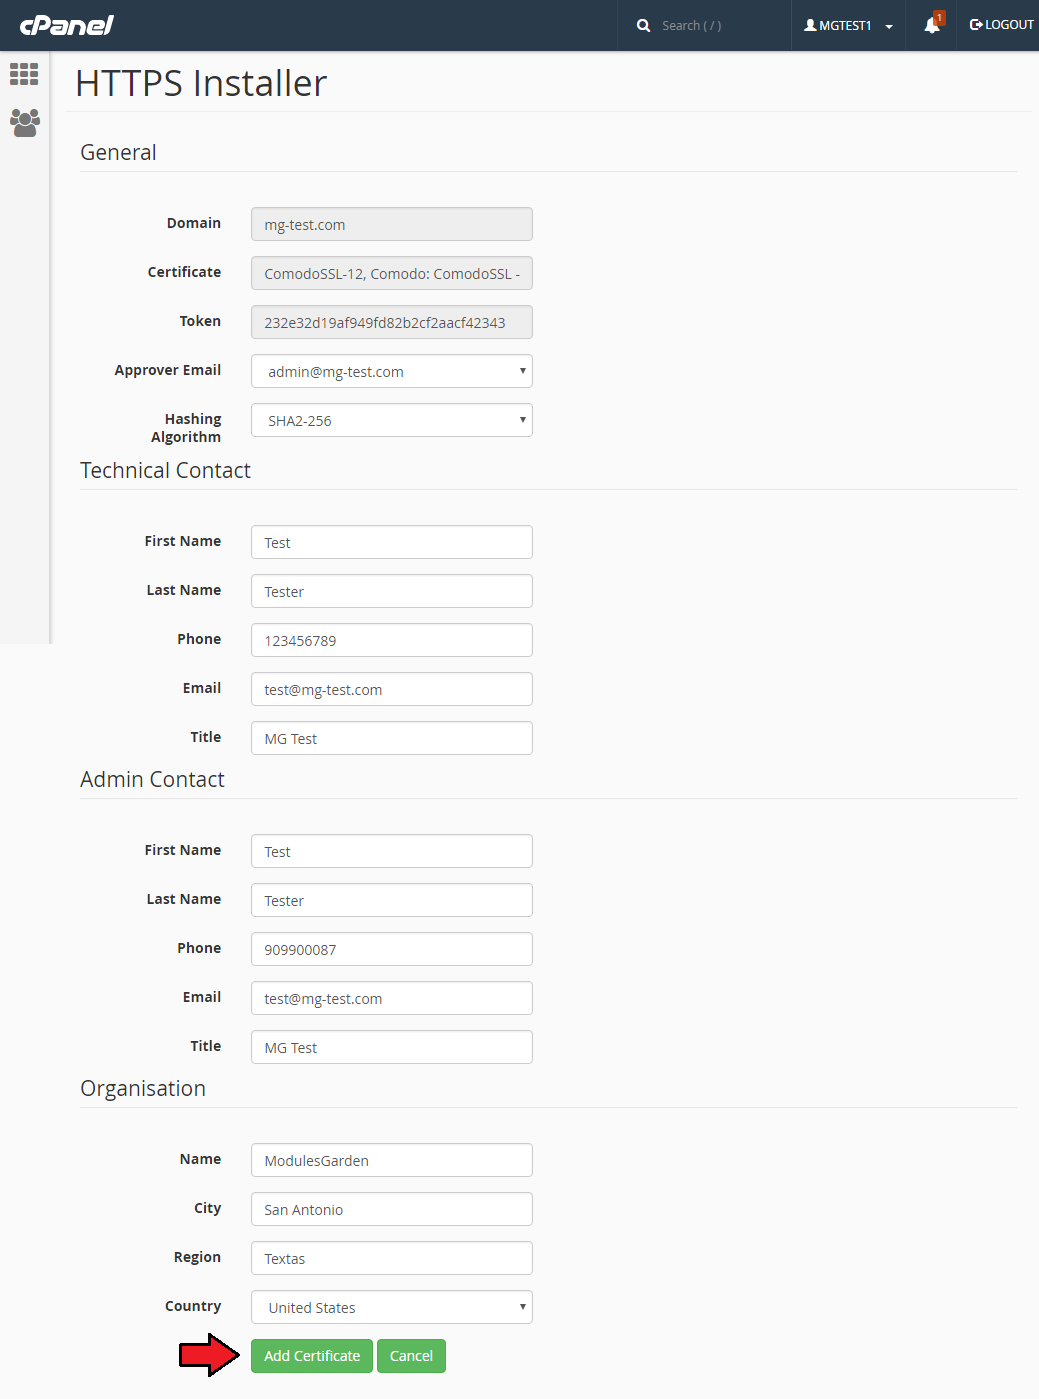
| If the token is correct, you will be taken to the form where you need to fill in the Admin, Tech and Organisation contact details as well as choose approver email and hashing algorithm. Keep in mind that availability of certain fields may depend on the type of ordered certificate. |
|
Management
| In case any issues occur while verifying the request, a cron task is automatically added to the line. The administrator may then trigger the action manually or wait until the system runs cron to process the request again. |
|
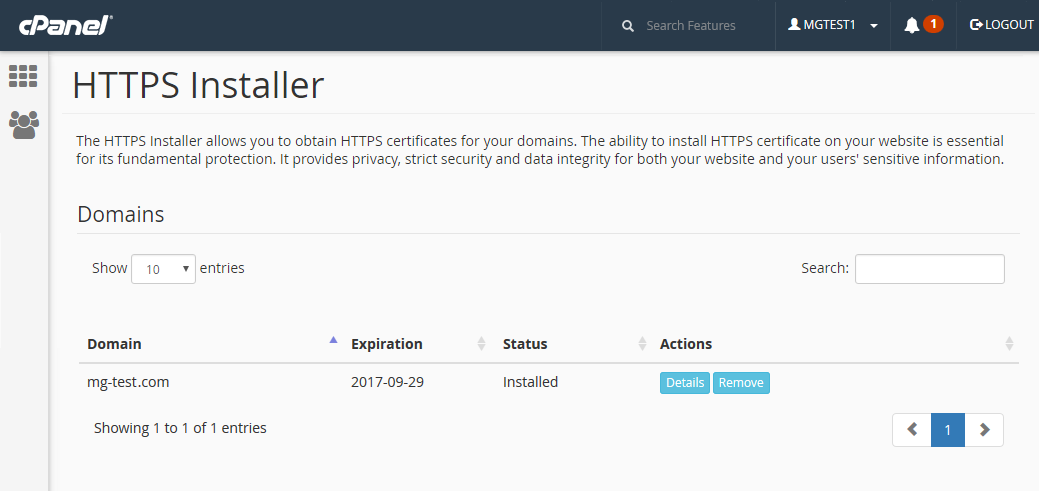
| If the verification is successful and the domain certificate is installed, the relevant information appears on the list. |
|
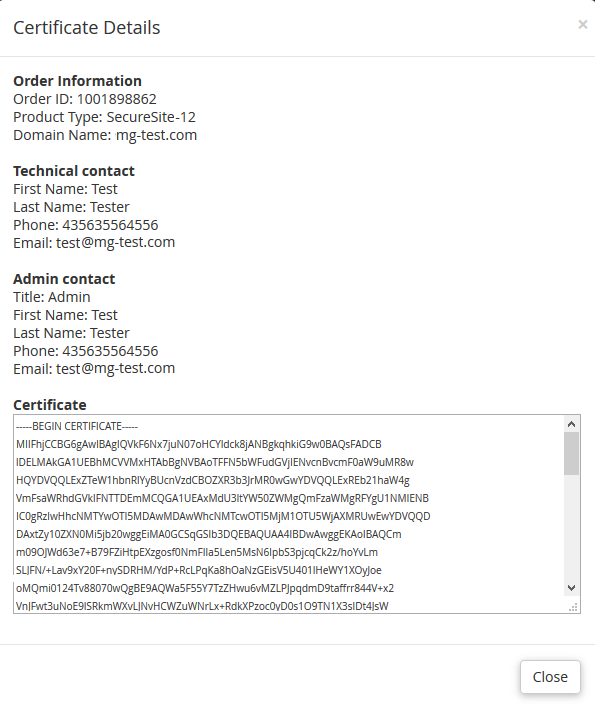
| Finally, there are three actions available to perform on the certificate: |

|
|
|
Tips
1. When you want to update or uninstall plugin simply run the 'install' file again:
cd /root/ServerTasticSSL/ sudo sh install Then follow the instructions on the screen by choosing the first or second option: |

|
Common Problems
| 1. When you have problems with connection, check whether your SELinux or firewall does not block ports. |
| 2. Due to the reason that Servertastic has dropped support for the free certificates, the module no longer supports them since version 1.1.0. Use the token system for sell paid certificates in WHMCS module instead. |